Aloe vera is likely the most popular houseplant on earth. Even folks who aren’t into houseplants own them, probably because they’re so easy to keep alive. They’re more like furniture than a plant. No matter how much neglect we dish out, countless aloes continue to grow in people’s homes, year after year.
It’s exactly this hardy reputation that also makes them a bit boring.
Let’s face it, the unchanging nature of aloe can’t compete with the excitement of an unfurling new Monstera deliciosa leaf. So today, I’d like to amp up aloe’s houseplant appeal.
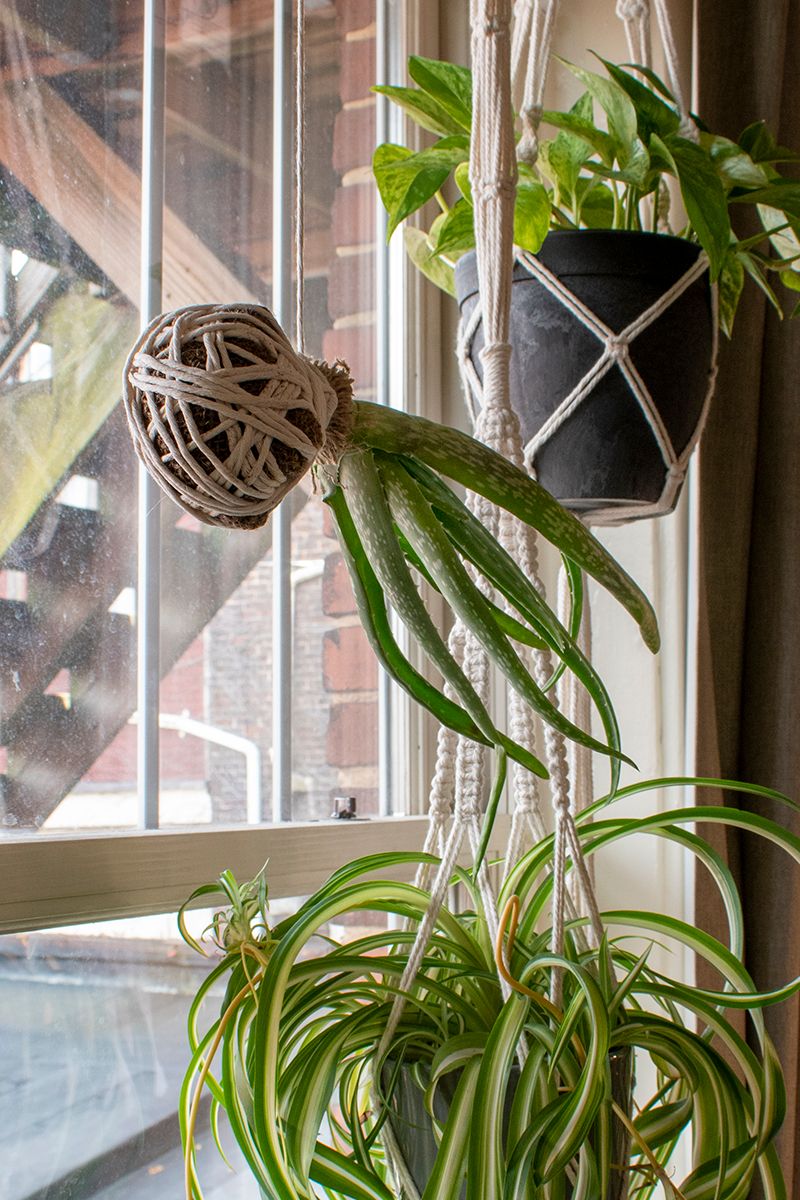
What if we moved your aloe from the coffee table to the air?
As most know, aloe vera is a succulent touted for its healing aloe vera gel. In their native habitat, they grow in sandy soil with shallow roots. They have adapted to living in an arid climate by storing water in their fleshy leaves. Surprisingly, they’re one of the few houseplants that thrive with infrequent watering. (Probably the secret to their survival.) There’s actually quite a bit about aloe that’s surprising.

Materials
Most of these are quite easy to come by; your local Walmart or craft store has everything you need.
- Scissors
- A square of burlap, it needs to be big enough to encompass the roots of the aloe, plus some substrate
- Cotton string, butcher’s string works great
- Pebbles
- Soilless growing media such as coconut coir, optional, but means less frequent watering
- A small aloe plant
The Process
Step 1
Remove your aloe plant from the pot and rinse the soil from the roots. Set the aloe plant aside for now.
Step 2.
Cut out a square of burlap. I cut mine to about 10”x10”. It’s okay if it’s on the bigger side, as we’ll trim it to fit later.
Step 3.
Place about 1/3 of a cup (a small handful) of pebbles in the center of the burlap. This gives the roots something to cling to and grow around. Next, add the soilless growing media if you’re using it.
Step 4.
Place the aloe plant in the center of the pebbles and media. Gently gather the edges of the burlap up around the base of the aloe. Using the cotton string, tie the burlap snuggly at the base. It needs to be tight enough to prevent the burlap from falling apart but not so snug as to strangle the aloe plant.
Step 5.
Trim away the excess burlap.
Step 6.
If you wish, you can leave the burlap exposed. It’s a nice natural look. Or you can wrap the outside with cotton string for a kokedama look. The added benefit of wrapping the outside of the burlap is the cotton string will wick moisture from the air and hold moisture after you water the plant, allowing the aloe more time to absorb it.
Leave a tail to hang your little aloe air plant, or snip it and set it up on its bottom.

Watering
To water your aloe air plant, you can set the burlap-wrapped end in a dish of water for a few minutes before rehanging it, or you can mist the burlap with a spray bottle. If you opt for the spray bottle, it’s best to spray the burlap daily. If you choose to soak the aloe in a dish, you only need to do so once every other week.
Hanging Your Aloe
Be sure you hang your aloe plant where it can receive at least 4-6 hours a day of bright sunlight. During the summer, check your aloe periodically to make sure it’s not receiving too much sun and getting sunburned.
Pups
This is a fun way of “potting up” aloe pups from a larger aloe plant. I am imagining four or five tiny hanging aloe plants in a window near the larger parent plant. For smaller aloes, you could even hot glue a magnet to the outside of the burlap and put your wee aloe air plant on the refrigerator.
Whatever you do, have fun with it, and send us pictures.
Ready for your next fun plant project? Why not build a terrarium?


